Hello Electronic Cottage Contributors!
This is a special information and tutorial page that I created to help you learn how to create, edit, and publish your own blog pages on the Electronic Cottage website.
First of all, thank you for being a member of the Electronic Cottage Community, and for contributing content to the EC site. Building and sustaining a community is often a difficult, rocky, bumpy road. I appreciate your patience and your loyalty to me and the EC Community.
Let's move on to the THE FUN. That's right. This is going to be a new era in the development of the EC Community because I am going to enable you to create, edit and publish your personal blog posts at the EC website if, when, how, and as it pleases you. This will give you new freedoms, so enjoy it! I will still insist on fairly high standards in content and image quality. Let's keep published items at the EC website "on-topic" (see the footer on any EC website page). Please try to avoid joke items and items about commercial and pop music, unless you can somehow tie those things into a discussion on experimental and electronic music. There's plenty of room at Facebook for that kind of stuff. Let's keep an emphasis, whenever possible, on one-of-a-kind published items, such as interviews, original essays, show reviews, photo essays, and artist profiles that cannot be found elsewhere.
All posts at the Electronic Cottage website must include at least one photo or picture of some sort! When you publish an article send your photo to me via email.
After September 19, 2019 the only contributors who will be allowed to publish new items at the EC website will be those who have agreed to learn how to set up and create their own blog posts, so let's get started!
Contact me if you are interested in publishing articles and I will help you set up your own Contributor Page from which all of your articles will be published.
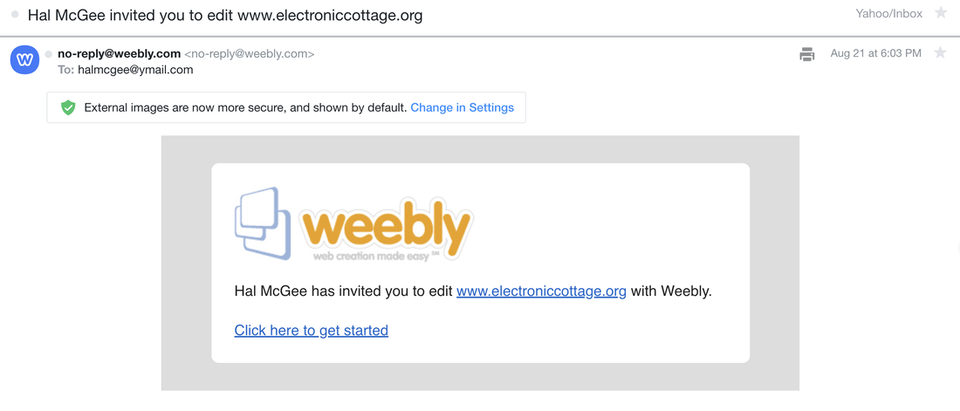
You will receive an email from me at the EC website that will look like the screenshot below.
Click on the hyperlink that says Click here to get started.
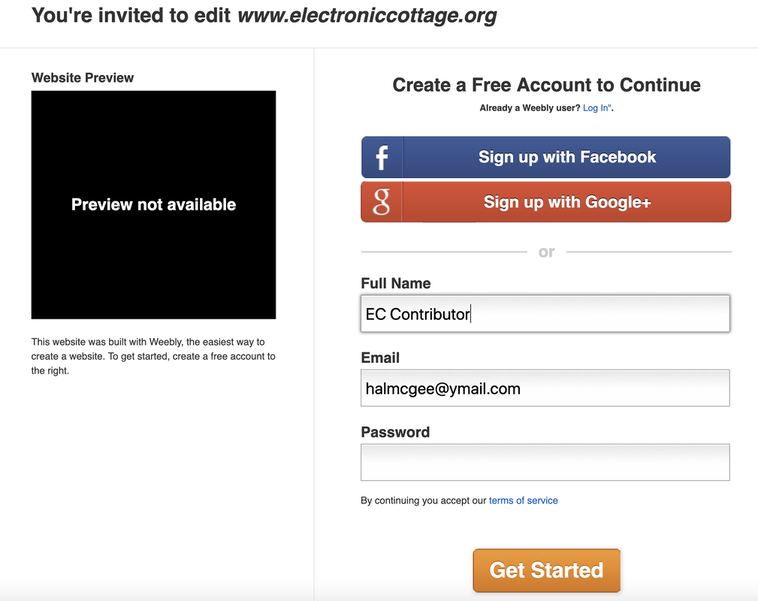
You will go to a page on the EC website that looks like this:
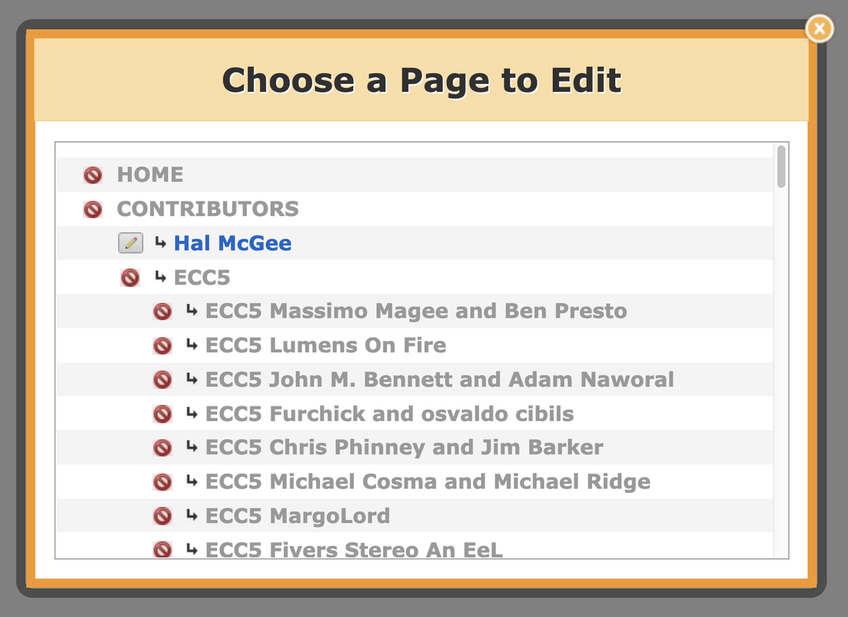
You will need to enter your name where it says Full Name and then choose a personal Password. Next, click on GET STARTED. Next you will see a page called CHOOSE A PAGE TO EDIT. In the dropdown menu, scroll down past all of those ECC5 pages until you find your name in the list of blog pages. To the left of your name you will see an EDIT icon that looks like a pencil. Click on your blue hyperlinked name and you will then go to your personal blog page at EC where you can begin to create new blog posts!
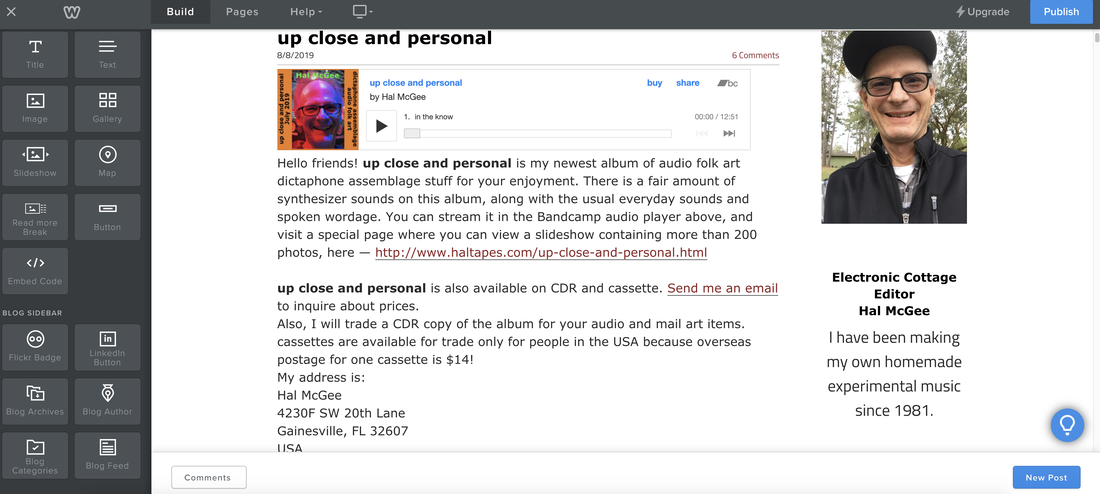
Your personal blog page at EC will look similar to this (below) or very much like it. Here below is what mine looks like. Yours will of course look different! It will have your most recent blog post at the top. Over on the right side of the page you will see the sidebar with your profile pic and biography, plus an archive list of all of the articles you have previously published at EC. The biography sidebar can be edited too, but it is a separate task from building a blog post.
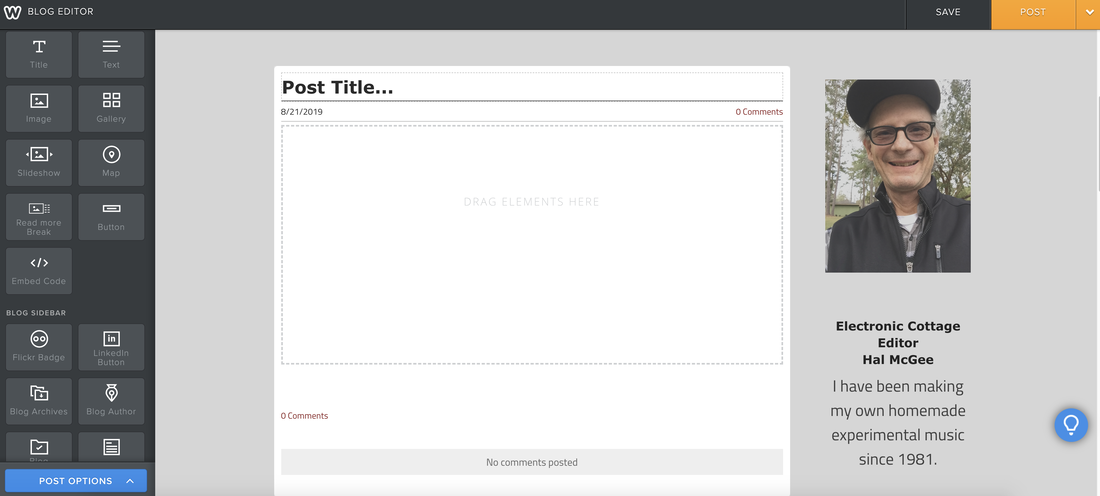
To create a new blog post click on the blue rectangular button in the lower right corner that says NEW POST. Next you will see this, below. The first thing that you will want to do is to give your post a title. I strongly advise giving your post a fairly short title, because the URL/web address of your post is generated from the post title. To the left, under the heading BLOG EDITOR, you will see several buttons for adding content to your blog. In the upper right corner you will see buttons for SAVE and POST. Click on POST only when you are completely satisfied that your post is ready for publication. If you want to continue working on your post later, click on SAVE to save a draft of your post. When you open up your page later you will see a list of your saved draft posts, and it will be a simple matter to click on the draft that you want to work on and then resume editing.
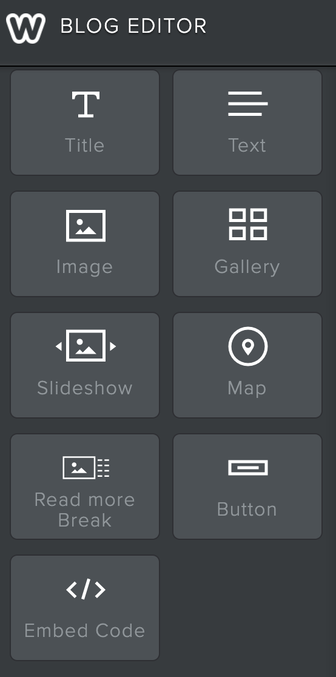
Next, let's take a look at the BLOG EDITOR.
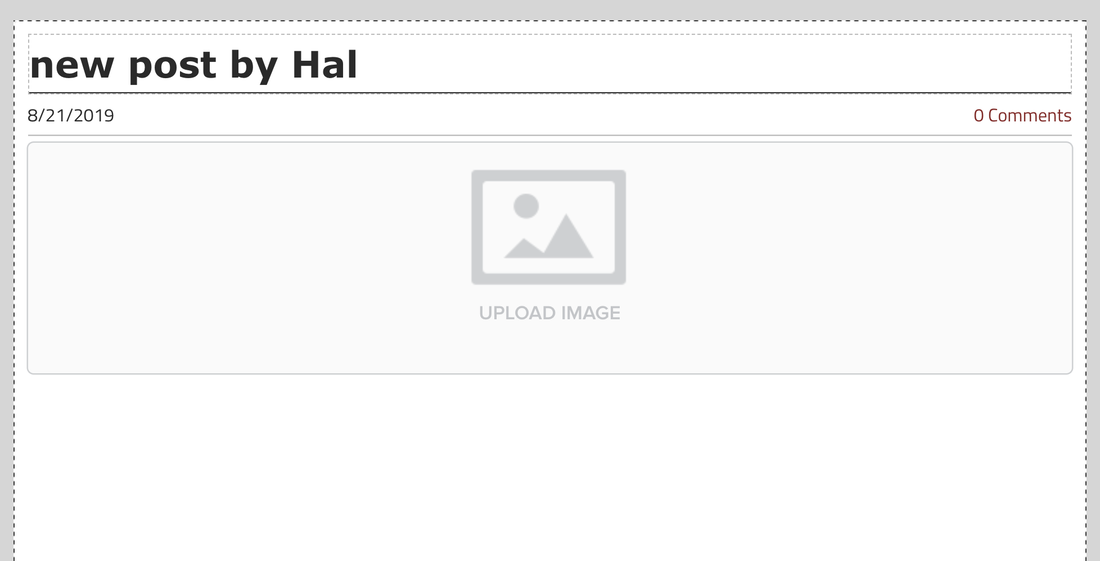
To start creating your titled post, drag an item onto the page. Let's say for example that you want to start out your article with a photo. Click on the button that says IMAGE and drag it onto the page below the title. You will probably see a blue line appear underneath the blog title as you drag the IMAGE button onto the page. Drop the IMAGE button underneath the title. It will look like the screenshot below.
To start creating your titled post, drag an item onto the page. Let's say for example that you want to start out your article with a photo. Click on the button that says IMAGE and drag it onto the page below the title. You will probably see a blue line appear underneath the blog title as you drag the IMAGE button onto the page. Drop the IMAGE button underneath the title. It will look like the screenshot below.
Next, click on the UPLOAD IMAGE button that you see above.
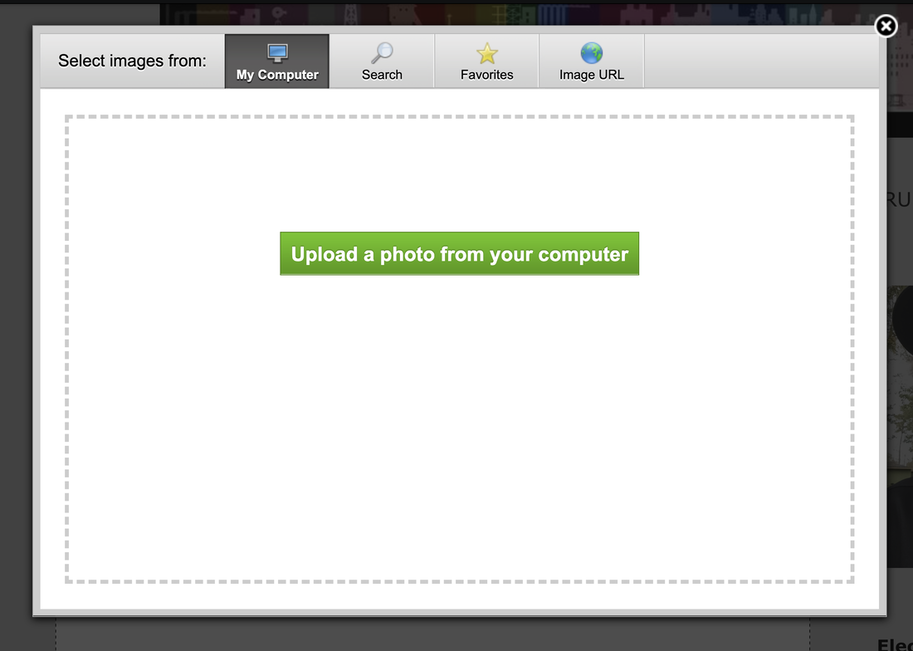
The next thing that you will see will be this:
The next thing that you will see will be this:
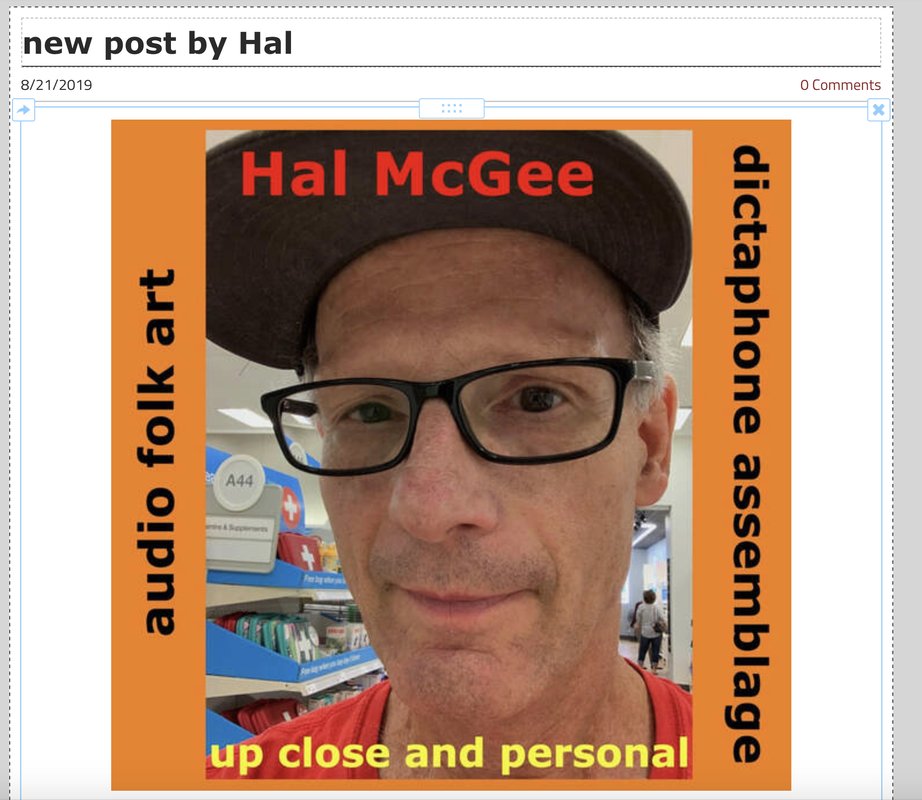
Click on UPLOAD A PHOTO FROM YOUR COMPUTER in the green button you see in the screenshot above, and navigate to the folder on your computer where your desired photo is located. Click on the file that you want and then it will load onto the blog page, like below.
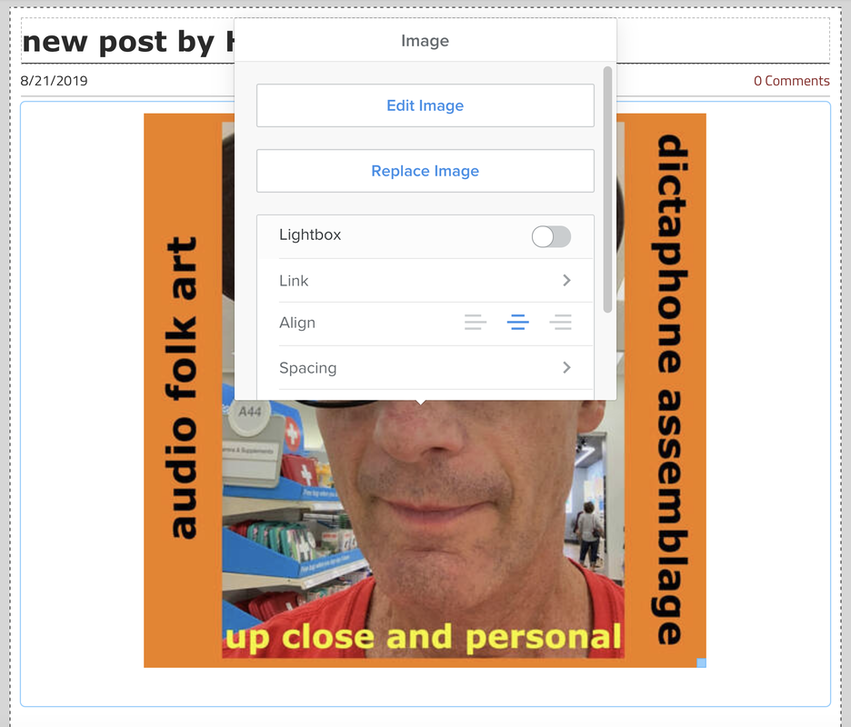
You can adjust the size of the photo by clicking in the lower right corner of the picture, and you will see a small blue square. To make other adjustments to the photo, click on the photo and you will see a menu of editing options. You can link the photo to a web page; align it left, right, or center; adjust the spacing; add a caption and other advanced features such as borders. Captions and advanced features can be found by scrolling down in the dropdown menu.
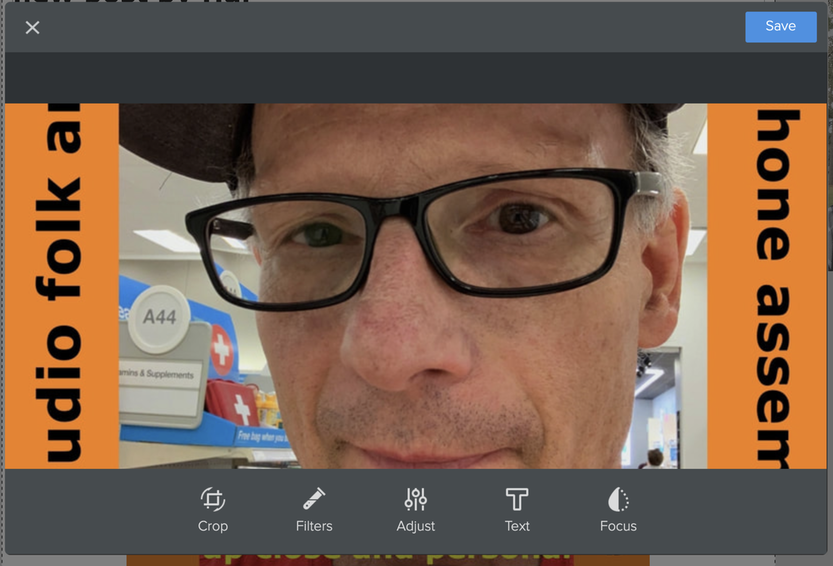
Clicking the Edit Image blue link will allow you to crop the photo, rotate it, apply filters, adjust the color and light, and more. Take a look below. Be sure to click on SAVE after you have edited the photo, and then click on the white X to close the Image Editor. As you can see above, you can also replace the photo if you decide that you prefer a different photo.
Next, let's say that you want to add a text. Drag the gray TEXT button to the space below your photo. Be sure that you see a blue line that runs all the way across the page below the photo and then drop the TEXT button below the photo. Then, of course, click on CLICK HERE TO EDIT and start typing your text.
After you have typed your text you can adjust it by clicking on the text edit menu bar. See the screen shot below. As you will see, you can change the size of the text, underline it, make it Bold, italicize it, and change the color. You can apply a hyperlink by underlining the words in the text that you want to link, clicking the link icon, and then entering the required info. I am not going to show you screenshots of all of those different text edit sub-menus. You will just need to explore.
I will show you just one more thing. You will need to take the time to explore all of the editing features. Most of them are simple to use and work in the same ways as above.
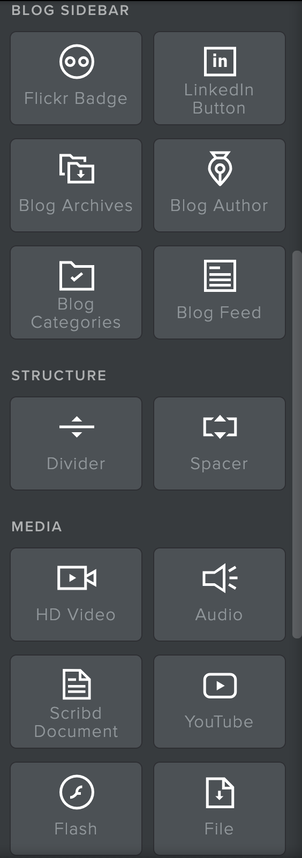
Scroll down in the BLOG EDITOR menu over on the left side of the page until you find the buttons for AUDIO and YOUTUBE. You can upload MP3 audio files of your choice. Just click on the AUDIO button and follow the instructions. These audio files will be streamable on the page and are stored on the EC website. It is really easy to do. It will just take practice. If you prefer to embed a Bandcamp audio player or an audio player from archive.org or Soundcloud, use the EMBED CODE button, which is up in the same section of the BLOG EDITOR tools where you found IMAGE and TEXT.
One more thing: the maximum size of any one file that you can upload to the site is 250 Megabytes. You can upload several large files totaling more than 250 MB, but no single file can exceed 250. So remember this if you want to use an audio player or offer a file download of material that is hosted on the site.
Any way, I could go on forever and ever, but you really just need to start working with creating a post. If you have questions or encounter difficulties, contact me. Be patient and do not panic! SAVE the post and then come back to it after you ask me how to fix the problems. For many of you who have built your own websites this stuff is going to be easy.
After you have published a new post, send me a message by email and I will announce it on the EC Home page. Please be sure to attach a picture file to the email so that I can have a picture to put on the Home Page.
Have fun!
Hal
After you have published a new post, send me a message by email and I will announce it on the EC Home page. Please be sure to attach a picture file to the email so that I can have a picture to put on the Home Page.
Have fun!
Hal
